Schedule a Report
When reports complete, the last run report is accessed on the Reporting > My Reports tab. Click the report name (blue text) link in the Last Scheduled Run column to access the generated report.
- Navigate to the Home page in the MSP view.
- Click Reporting.
- Locate the report by using the search or selecting it from the My Reports or Report Library sections.
-
Click
 .
.
-
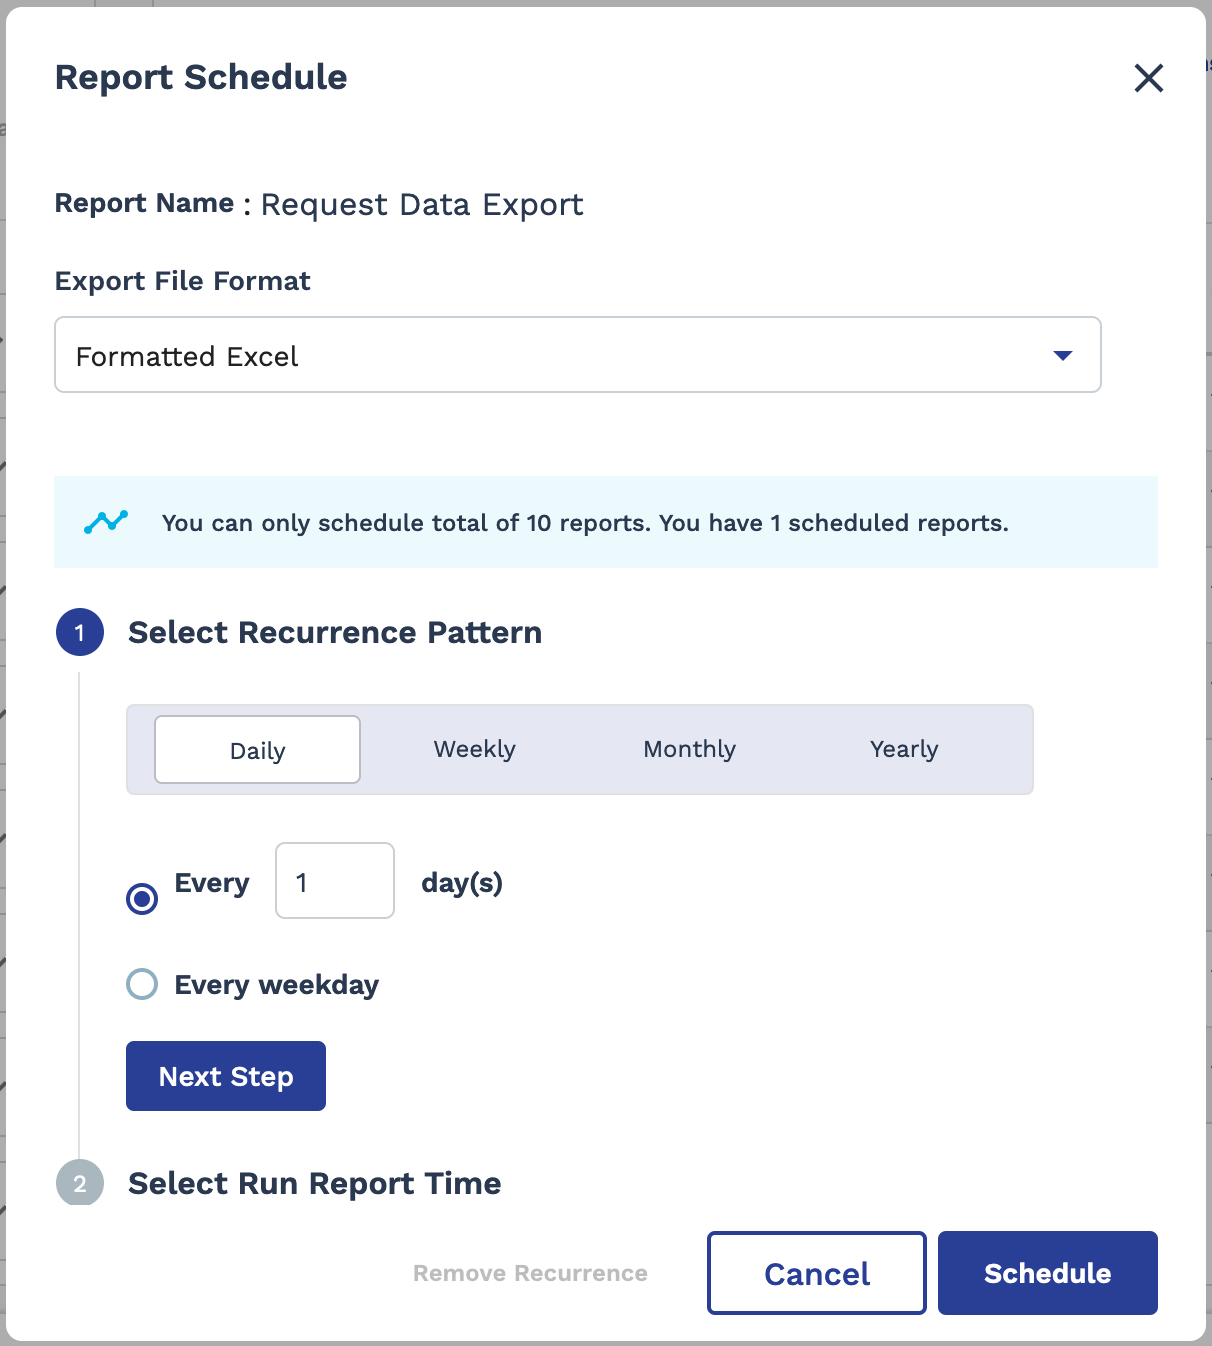
Configure the following schedule options, using the
 to navigate to the next section:

- Export File Format - From the drop down, select the file format to be generated.
- Select Recurrence Pattern - Using the radio
buttons, select from the following:
- Daily - If you select 'Daily', configure the report to run on a daily interval in number of days, or run every weekday.
- Weekly - If you select 'Weekly', configure the report to run on a weekly interval in number of weeks, and what day of the week to run on.
- Monthly - If you select 'Monthly', configure the report to run either on a specific date of the month and interval in number of months, or on coinsurance of the day and interval of the month in number of months.
- Yearly - If you select 'Yearly', configure the report to run on an interval in number of years, on a date during that year
- Select Run Report Time - Configure the exact time to run the report (time, timezone, and so on).
- Select Range of Recurrence - Configure the start date for the scheduled task, and the end date for the task (no end date, end after a number of intervals, or on a specific date).
-
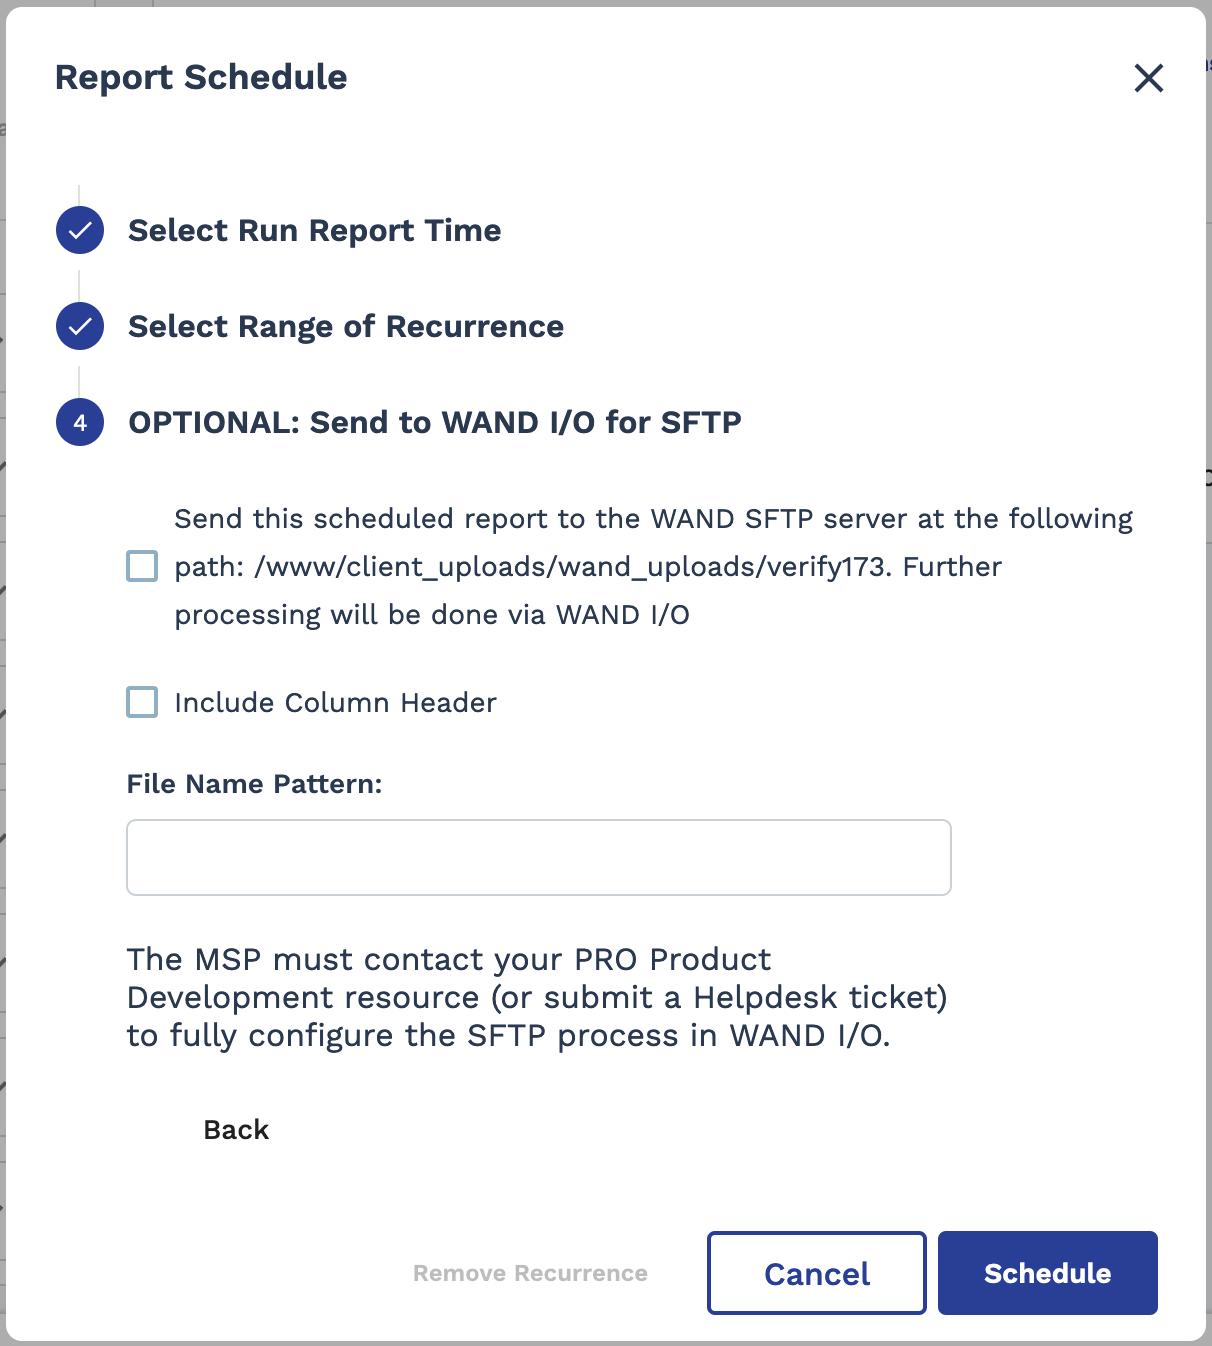
Configure optional Send to WAND I/O for SFTP:
Note: The SFTP (Secure File Transfer Protocol) is a service offered through Magnit I/O. It must be configured in the system and linked with a client organization's data in the application. For more information about using the transfer service, contact your Program Representative.

Select the Send this scheduled report... check box to send the report to the configured SFTP folder. The file cannot be transferred without further configuration in Magnit I/O.
Select the Include Column Header check box to insert information into the first row of the report file. The header includes the name of the report, a description, and the report run timestamp. For example:

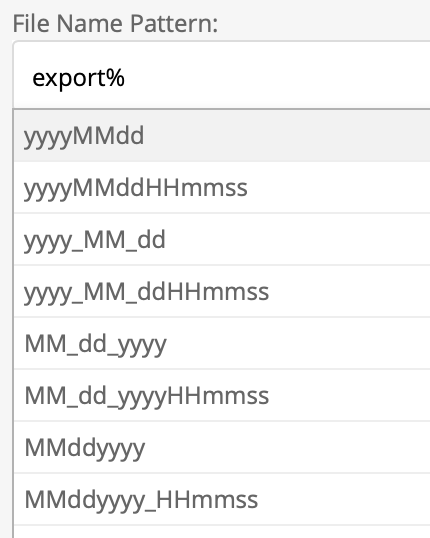
In the File Name Pattern field, enter the name and format for the file generation. Optionally, you can add a formatted timestamp to the file name by typing '%' to enable the variable editor pop up. From the drop down, select the desired format. For example:

Ensure that the timestamp variable is closed with another '%'.
-
Click
 .
Note: When selecting and viewing the report, the task interval appears on the button
 .
.